Paleo | Gluten-Free | Refined Sugar-Free | Grain-Free | Oil-Free | Vegan Option
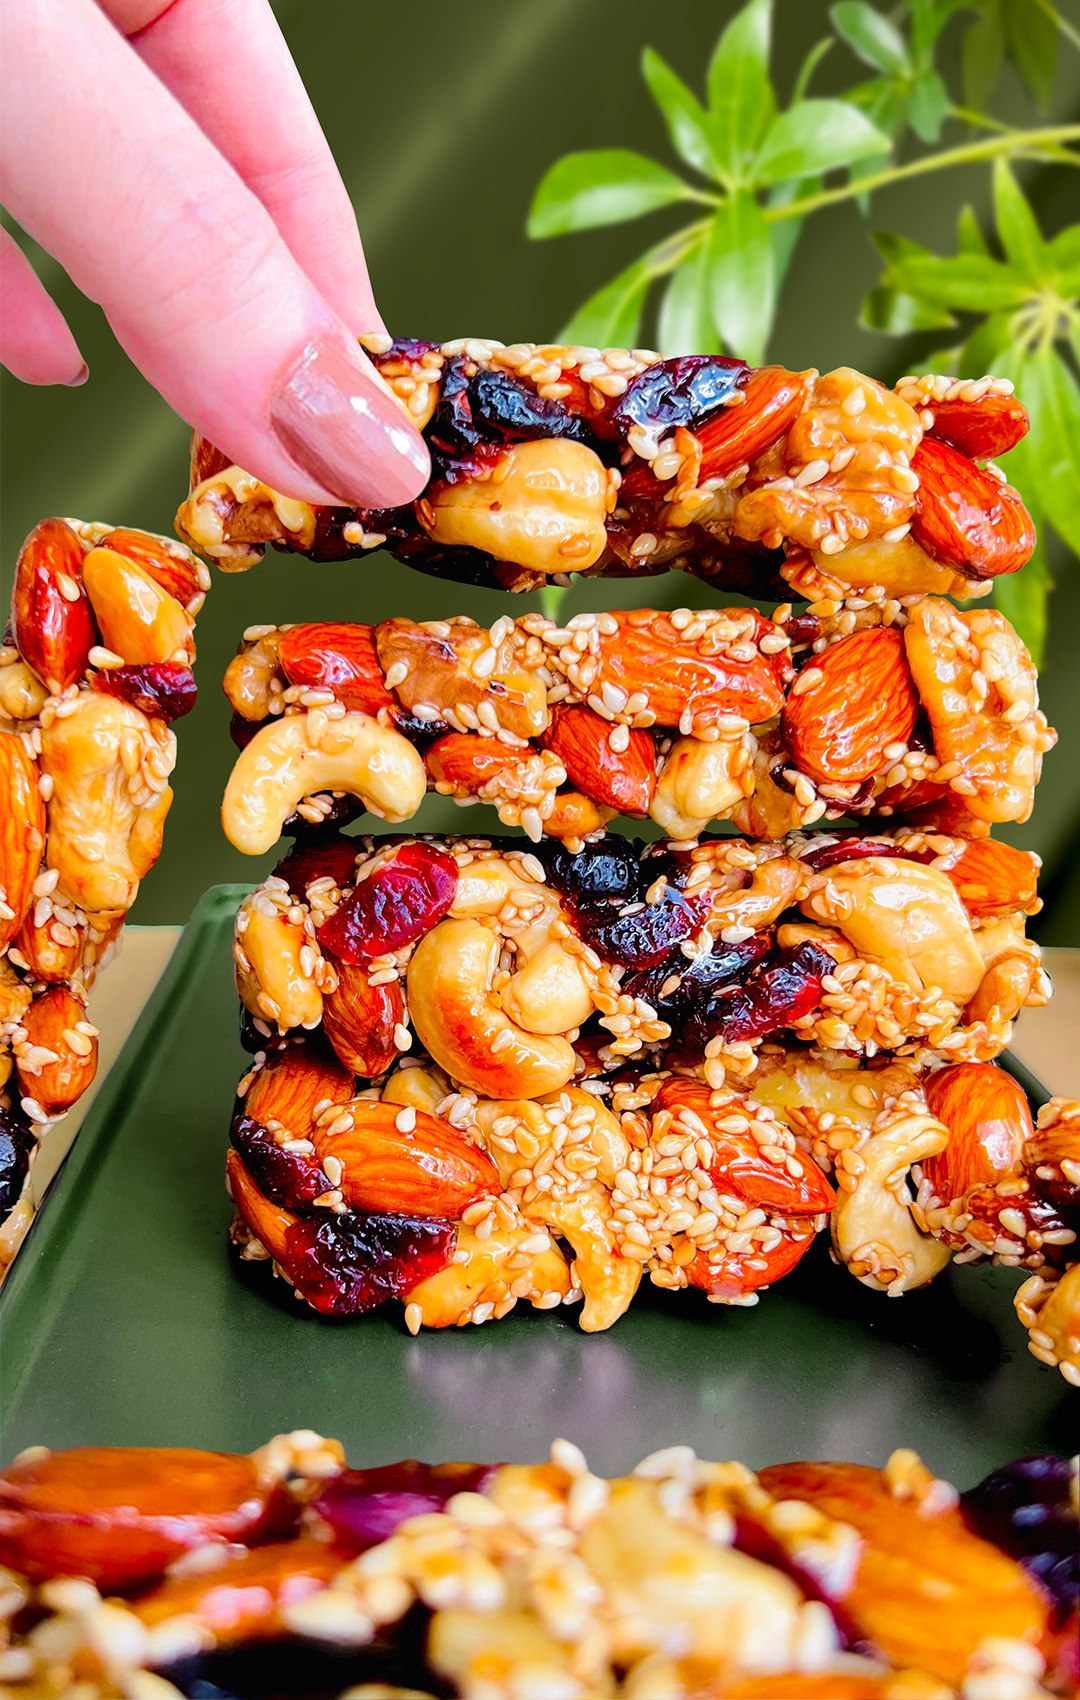
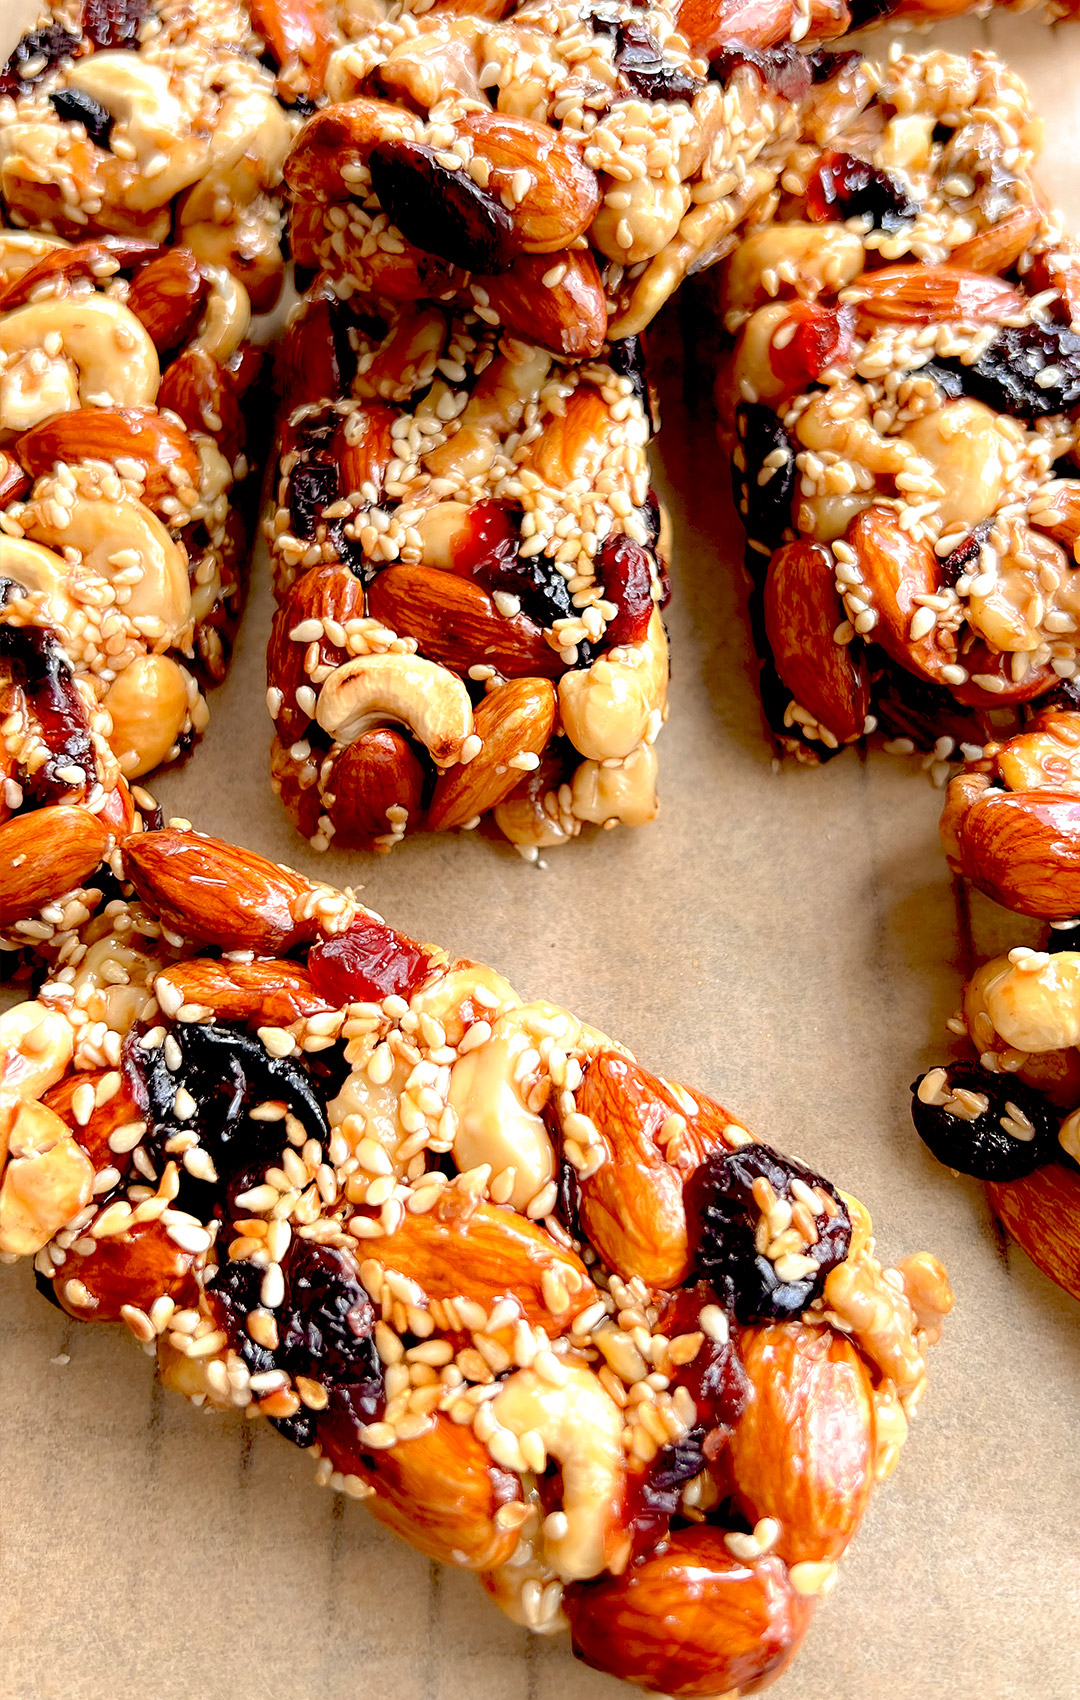
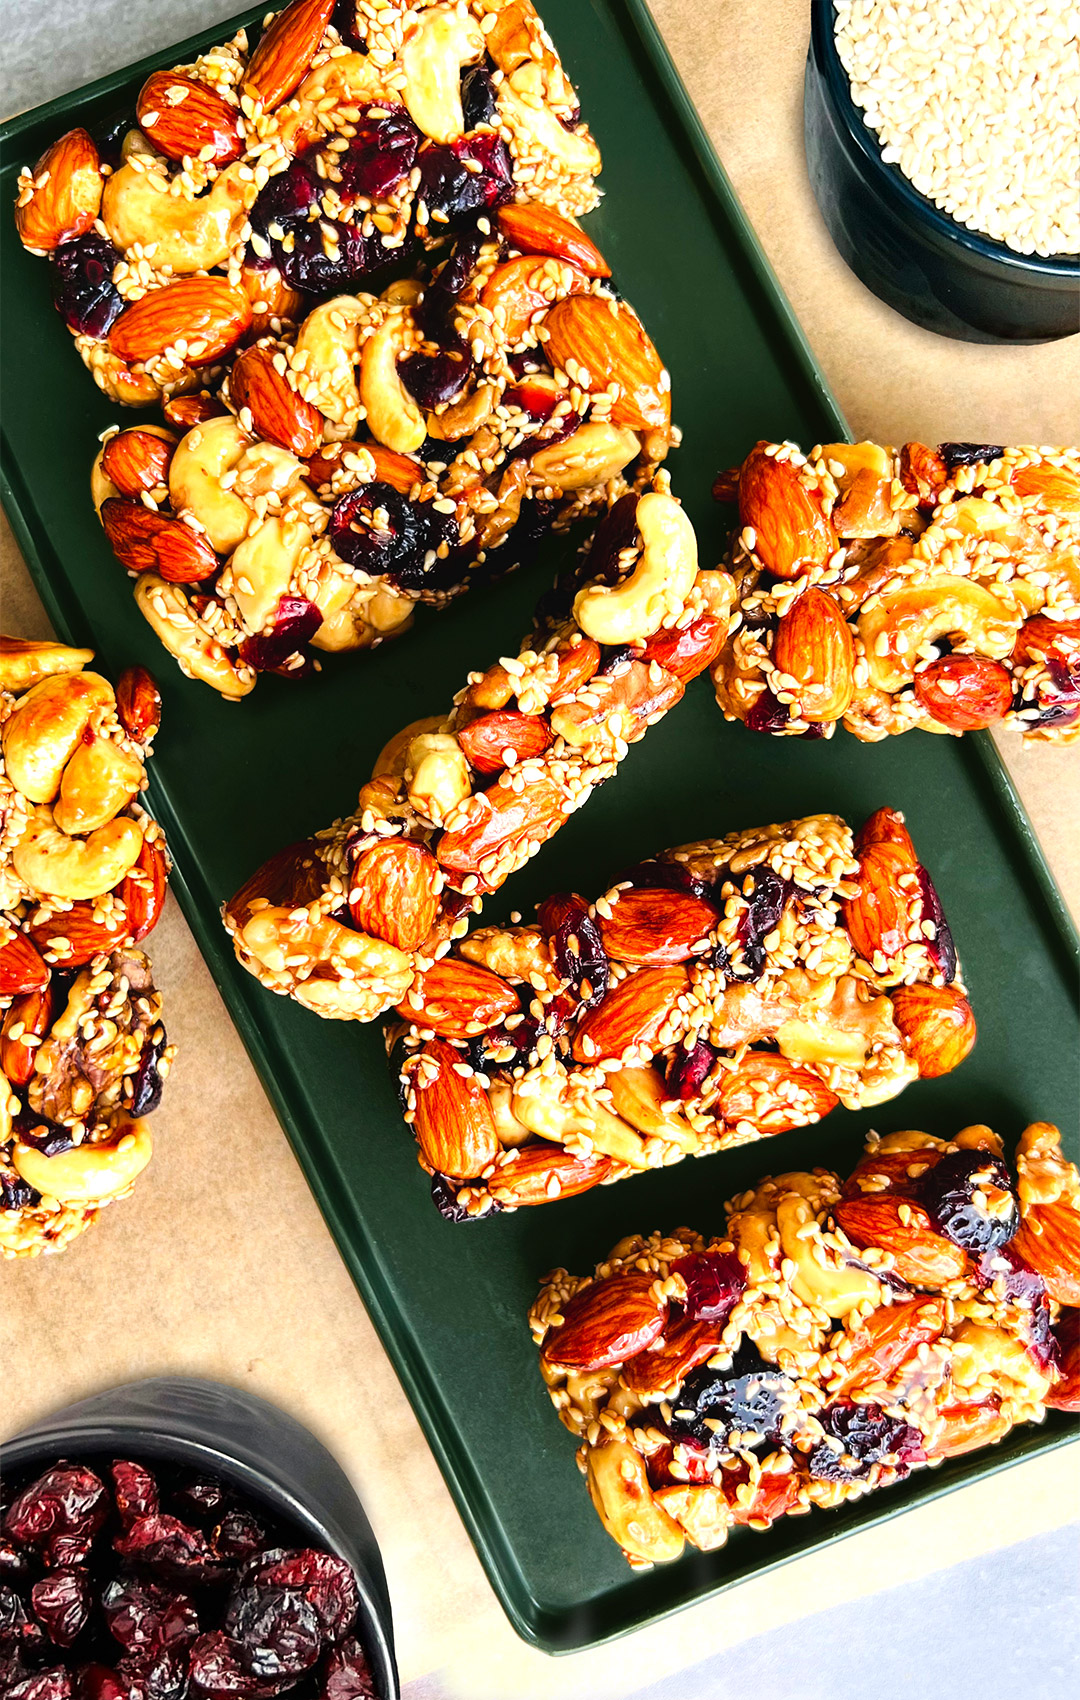
These Easy Pan-Made Nut & Seed Bars are a game-changer! They’re a quick, healthy, and delicious snack. Made with just six simple, wholesome ingredients, they deliver the perfect blend of sweetness, crunchiness, and nuttiness. Unlike traditional granola bars that require baking, these bars come together effortlessly in a single pan, saving you time while providing amazing flavour and texture. You’ll find these homemade barre.
These healthy nut and seed bars are more than just tasty. They’re packed with nutrients to fuel you throughout the day. You’ll love the satisfying crunch from the toasted nuts and seeds, the hint of natural sweetness from honey or maple syrup, and the pop of tartness from cranberries. They’re grain-free, oil-free, and free from processed sugars, making them a clean and energy-boosting snack. Each bar is loaded with protein, fibre, and healthy fats, keeping you satisfied and nourished with every bite.
These bars are perfect for any time. Make a batch ahead of time and store them in the fridge for a convenient snack. They’re great as an after-workout treat, a grab-and-go option for busy mornings, or a quick bite with your afternoon coffee. They’re versatile enough to fit into any part of your day, whether it’s a mid-morning boost or a treat to enjoy after dinner.
Nothing compares to the satisfaction of crafting my own homemade nut bars. Knowing exactly what’s in each bar, and that they’re made with pure, simple ingredients, makes them even more enjoyable. Give these bars a try and enjoy having a nutrient-packed, delicious snack at your fingertips whenever you need it. Let me know how you like them!
Ingredients Needed to Make These Easy Pan-Made Nut & Seed Bars
- Almonds:Add a satisfying crunch and are packed with healthy fats, fiber, and plant-based protein.
- Cashews:Contribute a creamy texture and provide additional protein and essential minerals.
- Walnuts:Bring a rich, earthy flavor and offer a good source of heart-healthy omega-3 fats.
- Sesame seeds:Add a light nuttiness along with calcium, fiber, and healthy fats.
- Dried cranberries (no added sugar):Provide natural sweetness and a hint of tart flavor without refined sugar.
- Honey or maple syrup:Act as natural sweeteners and binders while adding just the right touch of sweetness.
- Vanilla extract:Enhances the overall flavor with a warm, sweet aroma.
- Salt:Balances the sweetness and brings out the natural nut and seed flavors.
Why You’ll Love these Pan-Made Nut and Seed Bars
- Vegan option: Use maple syrup instead of honey
- Paleo-friendly snack
- Naturally gluten free
- Grain free and oil free
- High in plant-based protein
- Rich in healthy fats
- Great source of fiber
- Naturally sweetened with no refined sugar
- Quick and easy to make with no oven needed
- One-pan preparation with minimal cleanup
- Perfect for meal prep
- Great for breakfast, snacks, or on the go
- Ideal for pre and post workout fuel
- Crunchy and chewy texture made from whole ingredients
- Free from processed additives and preservatives
- Kid friendly and lunchbox approved
- Keeps well in the fridge for up to a week
- Customizable with other nuts, seeds, or dried fruits
Health Benefits & Nutrition of These Pan-Made Nut & Seed Bars
These Easy Pan-Made Nut & Seed Bars are not only delicious but are packed with nutrients and health benefits, making them a smart choice for fueling your day. Here’s why each bite is good for you:
- High in Protein: With almonds, cashews, walnuts, and sesame seeds, each bar is rich in plant-based protein. Protein helps build and repair tissues, supports muscle health, and keeps you feeling full longer.
- Rich in Healthy Fats: These bars provide heart-healthy fats, primarily from nuts and seeds, which help maintain energy levels and support brain function. Healthy fats are essential for nutrient absorption and provide long-lasting satiety.
- Good Source of Fiber: Packed with fiber from nuts, seeds, and dried cranberries, these bars promote digestive health and help maintain steady blood sugar levels. Fiber also aids in keeping you full, making these bars a satisfying snack or breakfast option.
- Naturally Sweetened: Sweetened with honey or maple syrup, these bars avoid refined sugars. Natural sweeteners provide a subtle sweetness while minimizing the impact on blood sugar, making these bars a healthier option for those looking to cut down on processed sugars.
- Antioxidant-Rich: Dried cranberries add a boost of antioxidants, which help fight inflammation and protect cells from damage. Antioxidants support immune health and are essential for overall well-being.
- High in Vitamins & Minerals: These bars are a good source of essential nutrients like vitamin E, magnesium, and calcium from nuts and seeds. Vitamin E supports skin health and acts as an antioxidant, while magnesium and calcium are vital for bone health and muscle function.
- Low-Carb Friendly: Free from grains, these bars are a good option for those looking to reduce their carbohydrate intake without sacrificing taste or texture. They’re a great fit for grain-free, low-carb, or Paleo diets.
- Sustained Energy Release: The combination of protein, healthy fats, and fiber makes these bars an excellent source of steady, sustained energy. This makes them perfect for active days, post-workout refueling, or keeping energy levels stable during busy schedules.
How to Make Pan-Made Nut and Seed Bars (Step by Step)
Step 1: Toast the Nuts and Seeds
Add the almonds, cashews, walnuts, and sesame seeds to a dry pan over medium heat. Stir continuously and toast for 4 to 5 minutes until they turn lightly golden and smell nutty. Stirring often and keeping the heat moderate prevents burning and brings out their full flavor.
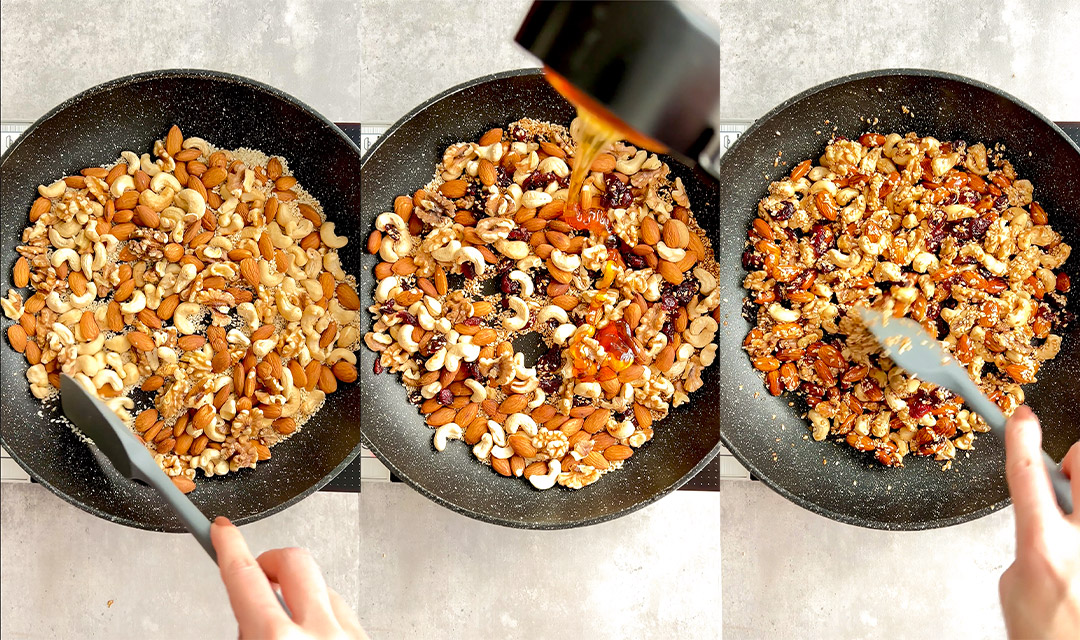
Step 2: Add Cranberries and Sweetener
Add the dried cranberries to the pan, then pour in the honey or maple syrup. Stir right away and keep mixing for 2 to 3 minutes until the mixture is sticky and everything is well coated. The syrup will begin to thicken quickly, so it’s important to work while the mixture is still warm and easy to handle.
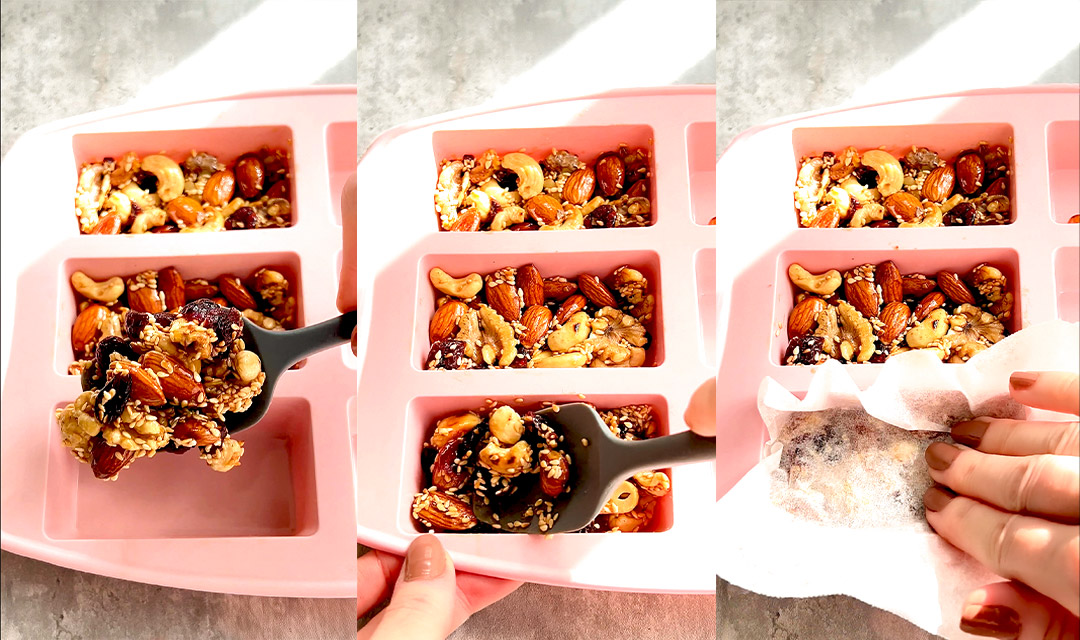
Step 3: Press and Shape the Bars
Transfer the warm mixture directly into each silicone bar mold. Press the mixture down firmly and evenly using a spatula or place a piece of baking paper over the top and press with your fingers to compact it well.
If you don’t have bar molds, use a loaf tin lined with baking paper and press the mixture evenly and firmly into the tin using the same method.
Step 4: Cool and Set
Let the bars cool completely at room temperature, then place them in the fridge for 30 to 60 minutes to firm up.
If you’re using silicone molds, the bars will set into individual pieces and do not need slicing.
If using a loaf tin, chilling fully before slicing will make it easier to cut clean bars without crumbling.
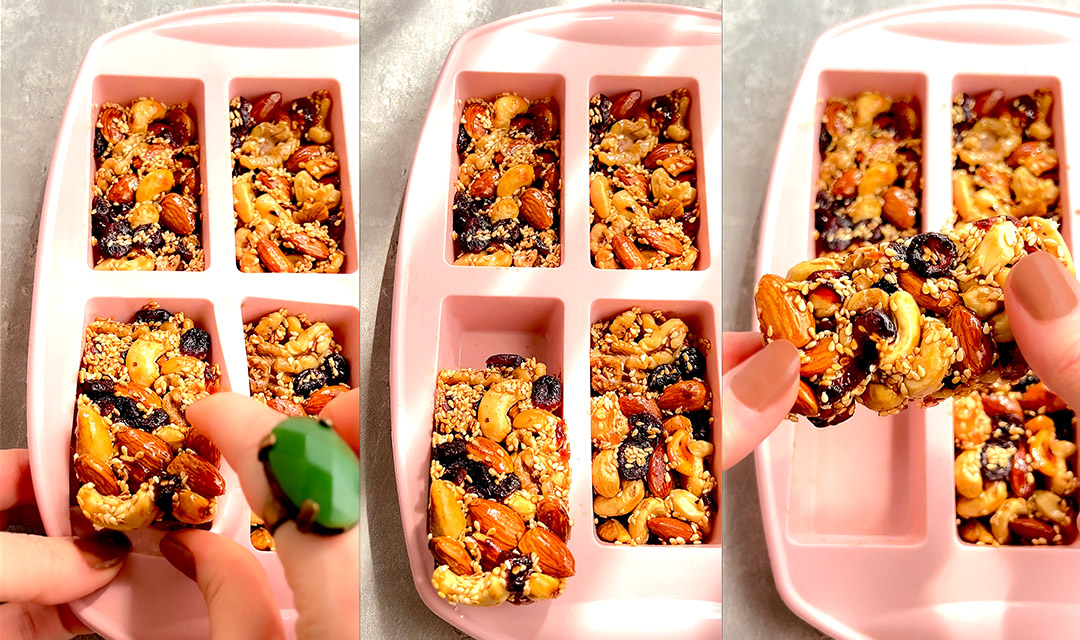
Step 5: Slice and Enjoy
Once fully set, remove the bars from the molds or cut into pieces if using a loaf tin. Store them in an airtight container in the fridge, where they will stay fresh and crunchy for up to one week.
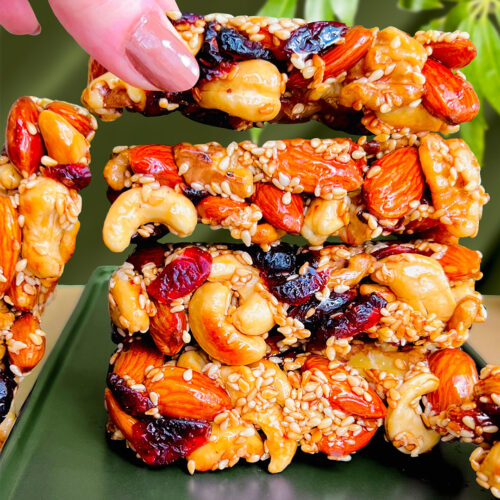
Pan-Made Nut and Seed Bars | Healthy, Easy, Paleo
Ingredients
- ¾ cup (100g) almonds
- ¾ cup (100g) cashews
- ¾ cup (100g) walnuts
- ¼ cup +2 tablespoons (40g) sesame seeds
- ¼ cup (30g) dried cranberries (no added sugar)
- ¼ cup (60ml) honey or maple syrup for vegan option
- ½ teaspoon vanilla extract
- pinch of salt
Instructions
- Toast Nuts & Seeds in the PanHeat a pan over medium heat. Add the almonds, cashews, walnuts, and sesame seeds. Stir and toast them together for 4–5 minutes until fragrant and lightly golden.
- Add Cranberries & SweetenerAdd the dried cranberries to the pan. Drizzle honey or maple syrup over the mixture, and cook for an additional 2–3 minutes, stirring continuously to coat everything evenly.
- Press & ShapeFor Silicone Bar Molds: Transfer the warm mixture directly into each silicone bar mold. Use a rubber spatula to press down the mixture firmly, shaping each bar. Alternatively, place a piece of baking paper on top and press down with your fingers if preferred.For a Loaf Tin: If you don’t have bar molds, use a loaf tin lined with baking paper. Press the mixture firmly and evenly with a rubber spatula. To smooth it out, place a piece of baking paper on top and press down with your hands to create an even, compact layer.
- Allow to Cool CompletelyLet the bars cool completely. For best results, place them in the fridge for 30 minutes or more after they’ve cooled to room temperature. This will help them firm up and make them easier to remove from the molds. If using a loaf tin, chilling also makes them easier to slice.
- EnjoyYour pan-made nut and seed bars are ready. For the best texture, store them in an airtight container in the fridge, where they’ll stay fresh for up to a week.
Note: These bars are great for meal prepping, providing a clean, energy-boosting snack with a satisfying combination of sweetness, crunch, and nuttiness.
Notes
Tips to Make the Best Bars
- Toast the Nuts and Seeds Properly
Toasting enhances flavor and adds a pleasant crunch. Stir frequently over medium heat to prevent burning and achieve a light golden colour. - Use a Good-Quality Pan
A non-stick or heavy-bottomed pan helps toast ingredients evenly and prevents sticking, ensuring the sweetener coats everything well without burning. - Press Firmly for Even Bars
• Silicone Moulds: Use a spatula or baking paper to press each bar down firmly. One piece of baking paper can be reused for pressing all bars.
• Loaf Tin: Line with baking paper, press the mixture firmly, and smooth the top with a second piece of paper pressed by hand. - Allow to Cool Completely
Cooling before handling helps the bars firm up. For best results, chill them in the fridge after they reach room temperature. - Store for Freshness
Refrigerate in an airtight container for up to a week. Chilling enhances texture and keeps them fresh.
Nutrition Facts per Serving
Nutrition per serving: 1 of 10 servings (~56 g each), Calories: 237 kcal, Protein: 6.2 g, Carbohydrate: 17.0 g, Net Carb: 14.1 g, Sugars: 10.2 g, Fat: 17.9 g, Saturated Fat: 2.1 g, Fiber: 2.9 g, Sodium: 40 mg, Cholesterol: 0 mgNutrition Facts Notes
- High in healthy fats from almonds, cashews, walnuts, and sesame seeds, supporting heart health and satiety.
- Provides a good source of plant-based protein (~6 g per bar) to help keep you full.
- The sugar comes naturally from honey and cranberries, offering quick energy and antioxidants, but portion control is important.
- Dietary fiber from nuts, seeds, and fruit supports digestion and helps balance blood sugar.
- Completely cholesterol-free and nutrient-dense, making it a wholesome snack option.