Healthy | Keto | Gluten-Free | Sugar-Free | Low-Carb | Grain -Free | Vegetarian
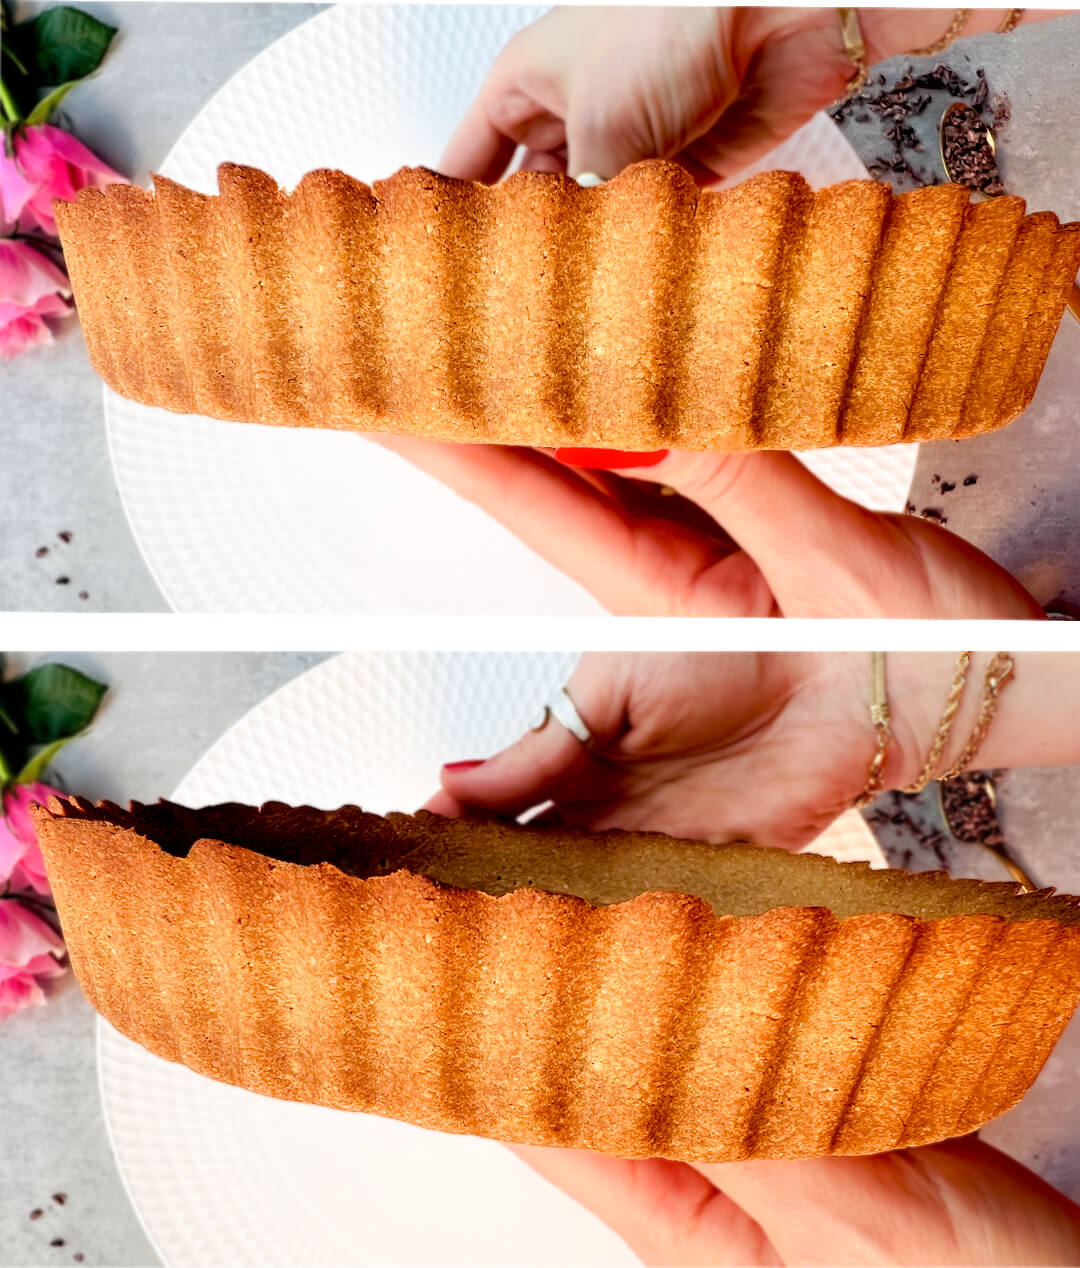
If you’ve been looking for a simple keto Tart Crust that actually works, you’re going to love this one. This easy keto Tart Crust is one of those recipes you make once and find yourself coming back to again and again. It comes together quickly with a handful of simple ingredients and requires no rolling. Just press it straight into the pan and it’s ready to bake.
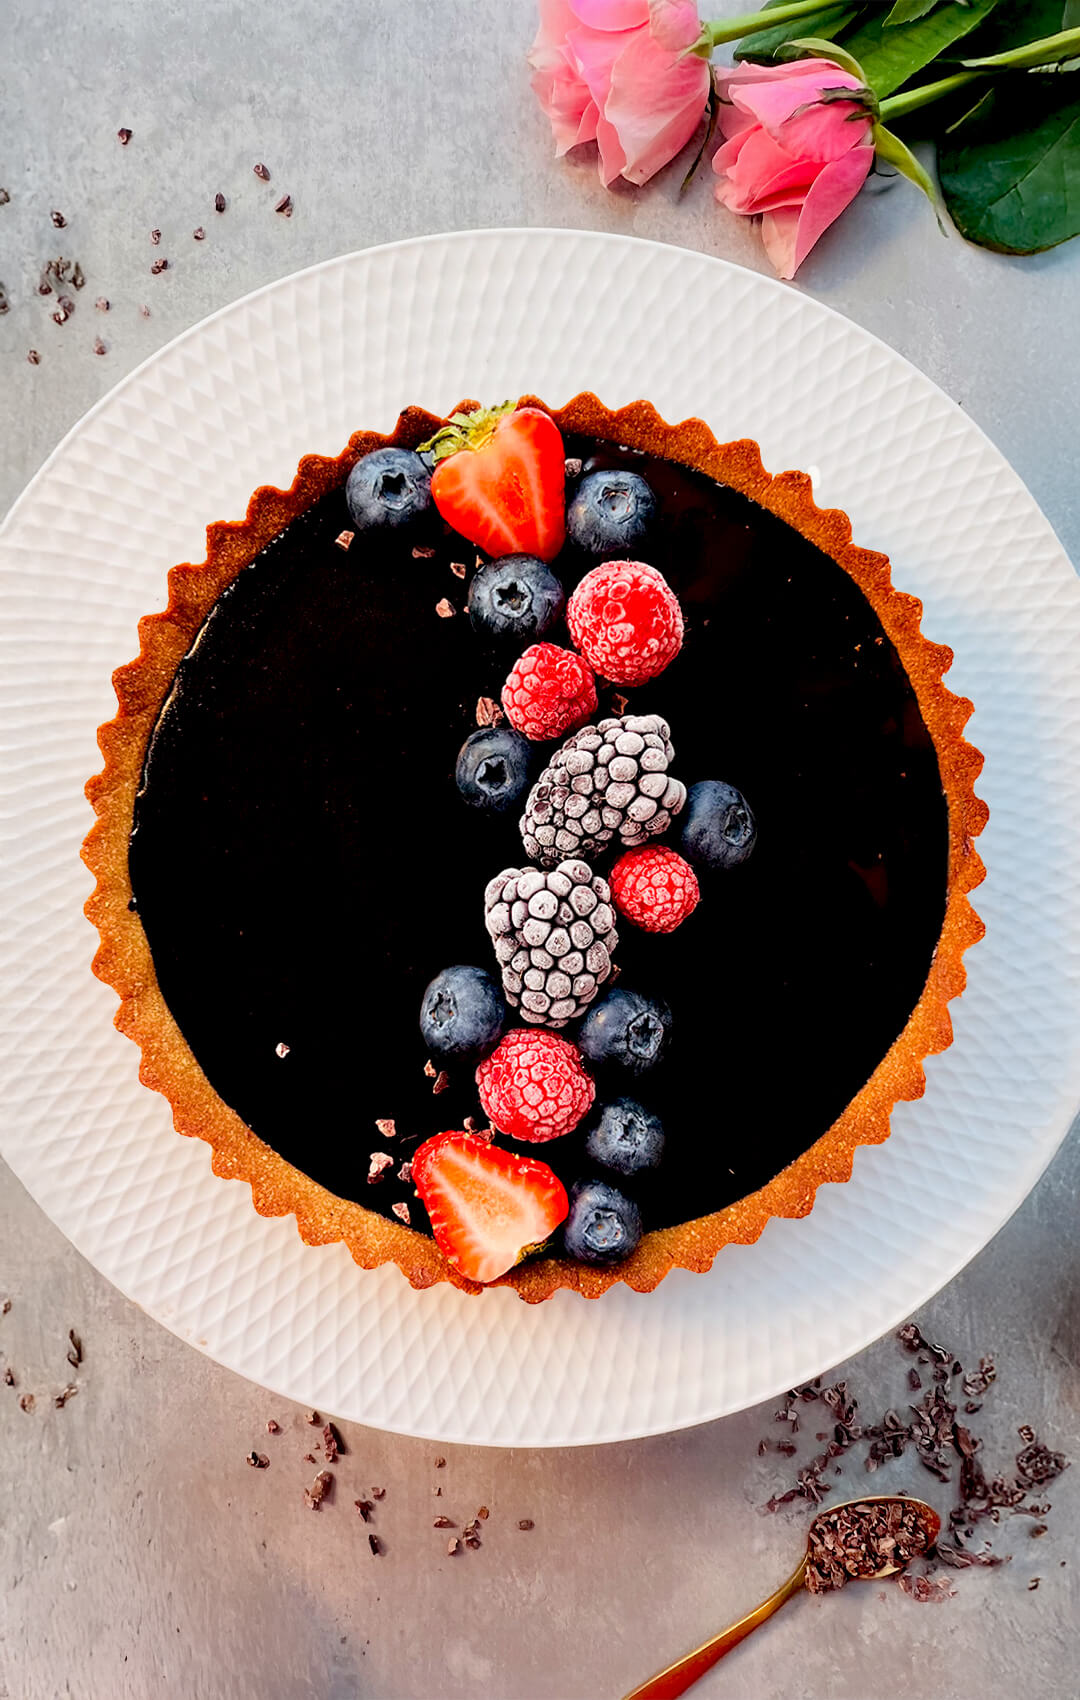
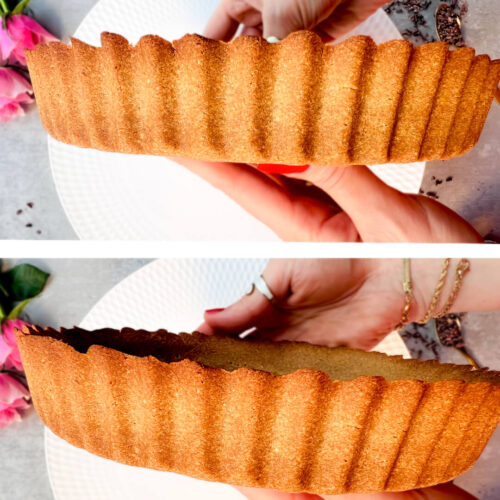
This low carb, gluten-free Tart Crust is incredibly versatile and works beautifully for dessert pies, tarts, cheesecakes, and no-bake fillings. Once baked, it has a light yet sturdy texture that holds together perfectly and pairs well with both sweet and lightly savoury flavours.
You can easily double the recipe for cheesecake bases, or add cocoa powder to turn it into a rich chocolate crust. It’s a reliable base that makes creating keto desserts simple and stress-free.
Why You’ll Love This Keto Tart Crust
- Holds together beautifully without crumbling
- Crisp edges with a tender, buttery texture
- Made with almond flour and coconut flour
- Naturally low carb, gluten-free, and refined sugar-free
- Optional cocoa for a rich chocolate tart crust
- Works for both baked and no-bake desserts
- Perfect for sweet or savory fillings
How to Make Keto Pie Crust Step by Step
If you want a simple keto pie crust that truly works, this is it. It’s the kind of recipe that feels effortless once you’ve made it, with no rolling, no chilling, and no complicated steps.
This crust comes together quickly using everyday low carb ingredients. You simply mix, shape, press into the pan, and bake. The result is a beautifully textured crust that holds its shape and works perfectly whether you’re baking a cheesecake or making a no-bake dessert.
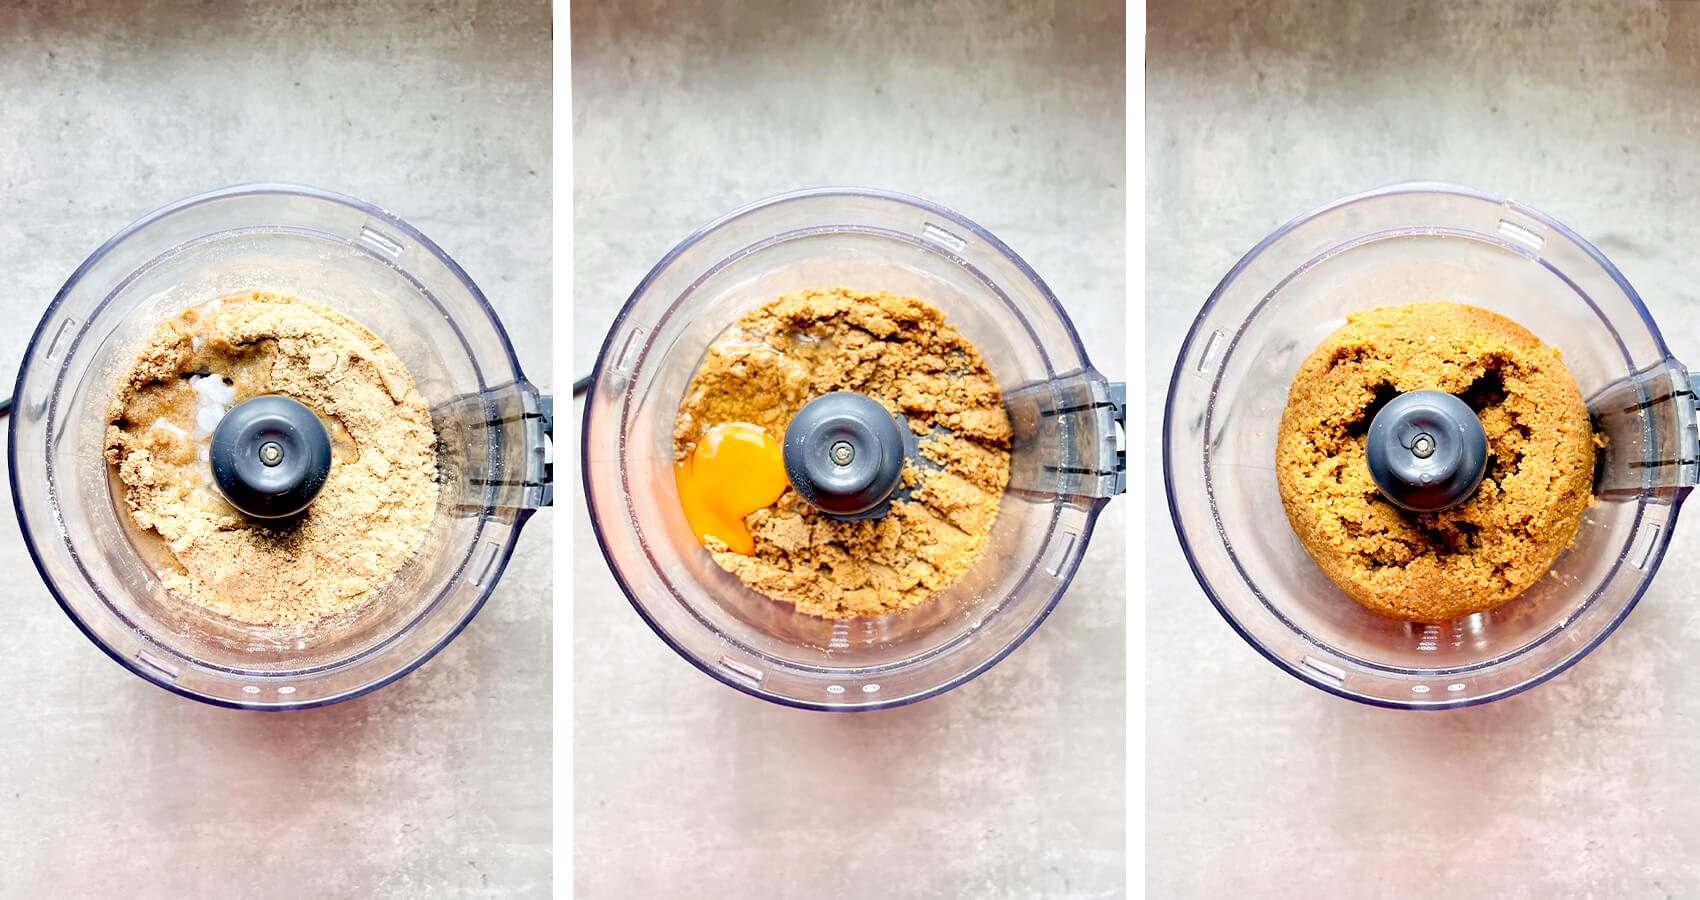
Start by adding the almond flour, coconut flour, psyllium husk powder, monkfruit sweetener, coconut oil, and salt to a food processor or mixing bowl. Mix until everything looks like soft sand. This helps the crust bake evenly and hold together well, so keep the mixing gentle and do not overmix.
Next, add the egg and ice cold water. Mix again just until the dough resembles wet sand and starts to come together when pressed. Avoid overmixing at this stage, as the coconut oil can release too much and make the dough feel oily. If the dough feels too dry, add a very small splash of extra water, just enough to bring it together.
Bring the dough together into a ball, then flatten it slightly using a glass, measuring cup, or your hands. The dough should feel soft, slightly crumbly, and easy to work with.
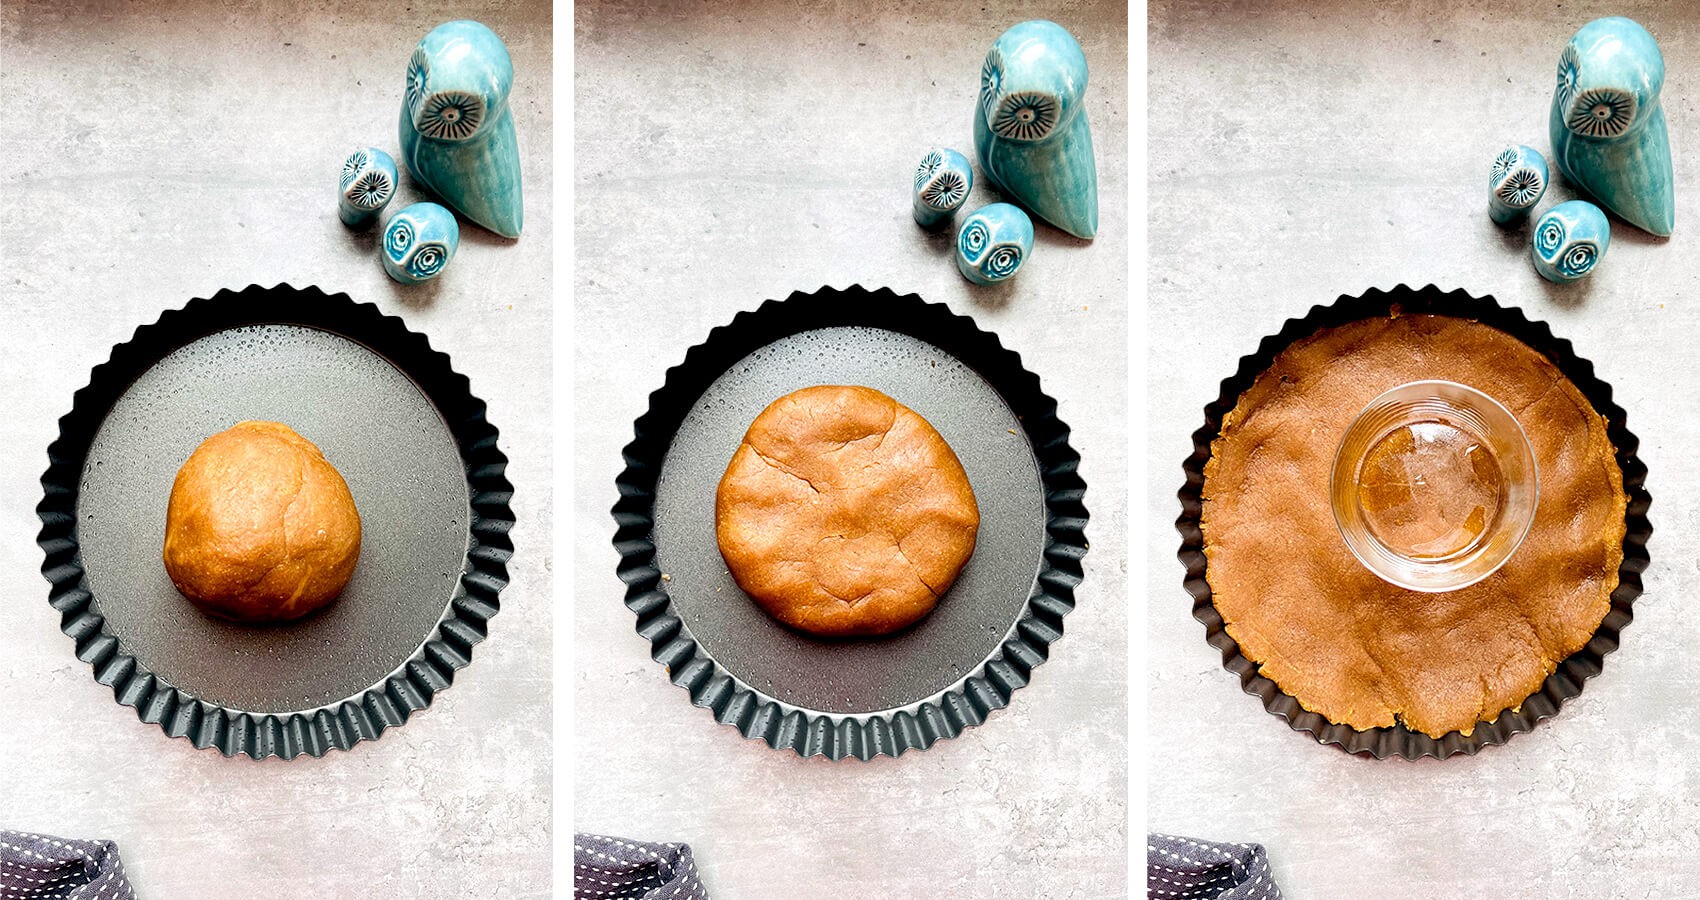
Press the dough evenly into your tart or pie pan, starting from the centre and gently working it outwards, then up the sides. Take your time to create a thin, even layer, as this helps the crust bake properly and gives a clean finish once sliced.
Once the crust is pressed into the pan, prick the base a few times with a fork. This helps prevent the crust from puffing up and allows it to bake evenly.

There are two simple ways to use this keto pie crust, depending on the dessert you are making.
For no-bake desserts, bake the crust until it is fully baked and set. Let it cool completely in the pan before adding your filling, then refrigerate as needed.
For baked desserts, pies, or cheesecake, par-bake the crust first, then let it cool completely in the pan. Add your filling and bake again, following the recipe for the second baking time.
You can also turn this into a chocolate crust by adding cocoa powder to the dough. If the dough feels dry after adding cocoa, simply add a little extra coconut oil until it presses easily into the pan.
KETO PIE CRUST | LOW CARB & GLUTEN-FREE
Ingredients
- 1/4 cup almond flour 28 g
- 1/4 cup coconut flour 30 g
- 1½ tablespoons psyllium husk powder
- 1 tablespoon coconut oil melted
- 1 large egg
- 3 tablespoons golden monkfruit sweetener or your choice 36 g
- 3-4 tablespoons ice cold water
- Pinch of salt
Instructions
- Mix Dry IngredientsAdd almond flour, coconut flour, psyllium husk powder, monkfruit sweetener, coconut oil and salt to a food processor or mixing bowl mix until a sandy texture forms. Do not overmix.
- Add Wet IngredientsAdd the egg and ice cold water. Mix again until the dough resembles wet sand and can be pressed together, don’t over mix as its get oily. Add a little extra water only if needed.
- Shape the DoughKnead dough into a ball and flatten using a glass, measuring cup, or your hands.
- Press Into the PanPress the dough evenly into a tart or pie pan (20 cm), making sure the base and sides are fully covered with a thin, even layer.
- Bake the CrustPrick the base a few times with a fork, then bake until the crust is set and lightly golden.For no-bake desserts, bake at 160°C fan or 180°C conventional (350°F) for 25–30 minutes until fully set. Let it cool completely in the pan before filling. Add filling and refrigerate.For baked desserts, pie, or cheesecake, bake at 160°C fan or 180°C conventional (350°F) for 12–15 minutes to par-bake. Let it cool completely in the pan, then fill and bake again, following the recipe for the second baking time.
Notes
Instruction Notes
- Note you can make it sweeter, by adding more sweetener.
- For cheese cake base, make the recipe double x2.
- Add 2 table spoon cocoa powder to make chocolate crust, if it gets dry add a teaspoon extra coconut oil.
Nutrition per serving: 1 of 8 servings
Calories: 77 kcal, Protein: 2.6 g, Carbohydrate: 3.9 g, Net Carb: 1.5 g, Sugars: 0.6 g, Fat: 6.2 g, Saturated Fat: 2.4 g, Fiber: 2.4 g, Sodium: 41 mgNote: This recipe yields 8 slices from a 20 cm (8-inch) pie crust

